Stop confusion with empty parameters in Dashboards
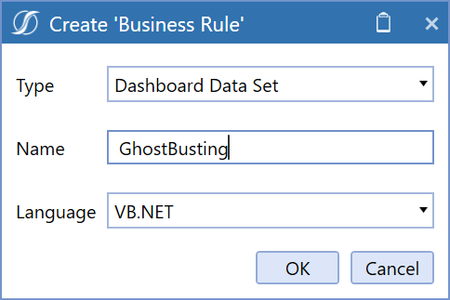
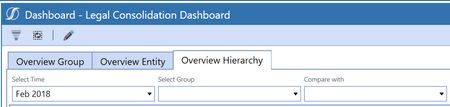
Tired of opening your dashboard to find no pre-populated values? Frustrated when your combo boxes and list boxes don’t display a value upon runtime? This brief blog post will assist admins/super users in populating those values to avoid confusion for end users when they open a dashboard devoid of any values.2.2KViews15likes5CommentsMap Component Tutorial
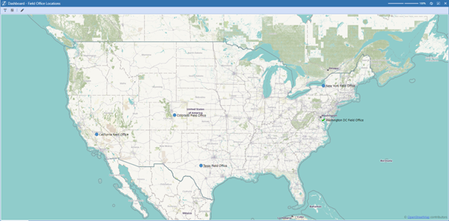
So you’ve bought the OneStream Advanced Reporting and Dashboards book - congratulations on being on your way to mastering these tools! The book is chocked full of examples and guidance on how to tailor your user experience, but here’s something extra – a tutorial on how to use Map Components in your application. We’ll walk through setting up a Dashboard with an interactive map to provide users with a visual display of locations, from collecting coordinates to displaying locations that are click-enabled to display relevant data.3.5KViews9likes3CommentsMenu Component in Practice
If you create the new Menu Component in your Maintenance Unit, you will quickly notice that it has very few properties. That's because its configuration will actually come from an attached Data Adapter, which must produce a set of tables containing all menu items and their configuration. The format of such tables has to be somewhat precise, matching what the component expects. For this reason, the best way to produce them (at least while you familiarize yourself with this mechanism) is to create a Dashboard DataSet using a couple of utility classes built for this specific task. The first thing we will do, in our rule, is to create an XFMenuItemCollection object. This represents our menu, which we will populate with items and eventually return (as a DataSet) at the end of the function. Public Function Main(ByVal si As SessionInfo, ByVal globals As BRGlobals, ByVal api As Object, ByVal args As DashboardDataSetArgs) As Object Try Select Case args.FunctionType Case Is = DashboardDataSetFunctionType.GetDataSet If args.DataSetName.XFEqualsIgnoreCase("MainMenu") Then ' create the menu object Dim menu As New XFMenuItemCollection() Menu items will be created by instantiating objects of type XFMenuItem. These objects will hold all the configuration properties for the item, including the font and colors that it will use. There are a few different constructors you can use, to specify all sorts of properties; the one used here is the shortest one! ' create top-level item ' XFMenuItem(string uniqueName, string headerText, string foreground, string background, bool isBold, bool isItalic, bool isEnabled, bool isSeparator, string parameterValue) Dim parentMenuItemOne As New XFMenuItem("1", "Parent", _ "White", "SlateGray", False, False, True, False, Nothing) ' create items for the second level Dim childMenuItemOne As New XFMenuItem("1.1", "Child 1", _ "Black", "White", True, True, True, False, Nothing) Dim childMenuItemTwo As New XFMenuItem("1.2", "Child 2", _ "Black", "White", True, True, True, False, Nothing) ' create item for the third level Dim grandChildMenuItemOne As New XFMenuItem("1.1.1", "Grandchild 1", _ "White", "SlateGray", True, True, True, False, Nothing) Most of the properties are self-explanatory, but you might wonder what "parameterValue" is. That's the value that will be pushed into the Bound Parameter specified on the actual component later on, so that Actions or other components can pick it up. We will come back to this later. Now we need to define the relationships between items. We do that by manipulating the .Children property of each parent item, which must be a list containing the children (duh!) items. ' create the hierarchy by adding children to direct parents as a List ' attach 1.1.1 as a child of 1.1 childMenuItemOne.Children = New List(Of XFMenuItem) From {grandChildMenuItemOne} ' attach 1.1 as a child of 1 parentMenuItemOne.Children = New List(Of XFMenuItem) From {childMenuItemOne} ' you can also manipulate the list once created. ' attach 1.2 as a child of 1 parentMenuItemOne.Children.Add(childMenuItemTwo) In a similar way, top-level items are added to the list contained in the .MenuItems property of our XFMenuItemCollection instance. ' add item 1 as a top-level members of the menu menu.MenuItems.Add(parentMenuItemOne) Before we return the resulting menu, if you are dealing with dynamically-generated structures with a lot of members, you might want to perform a safety check and purge extra members: While menu.IsAboveMaxMenuItemLimit(si) menu.MenuItems.RemoveAt(menu.MenuItems.Count - 1) End While Last, we use the .CreateDataSet method of our menu object to return the DataSet. ' generate the dataset and return it Return menu.CreateDataSet(si) Now that we have the rule, we can create a DataAdapter to execute it. Notice how, when testing it, it produces two tables: one with item properties, and one with their relationships. Now that we have an Adapter, we can create the Menu Component and attach the Adapter to it. You can then assign it to a Dashboard and preview it, after you save it. This is fun but a bit pointless! We want menus so that the user will actually choose something and we'll get the result of that choice. In order to do that, we need to specify the Bound Parameter. Whenever the user selects an item, the "parameterValue" associated with that item will be pushed into the specified Parameter; we can then reference that Parameter in an Action or extender rule, to trigger something like navigating to a website. Note that the Parameter doesn't need to exist! OneStream will just create one for you in the background. Then we place an Action on our Component, referring to the Parameter. The last step is to go back to our rule and specify a different parameterValue for "leaf" items, so that the Parameter will contain something. Dim childMenuItemTwo As New XFMenuItem("1.2", "Main Page", _ "Black", "White", True, True, True, False, "https://www.onestream.com") ' create item for the third level Dim grandChildMenuItemOne As New XFMenuItem("1.1.1", "OneCommunity", _ "White", "SlateGray", True, True, True, False, "https://community.onestreamsoftware.com") Et voilà! You can now execute the Dashboard and verify that it works!685Views8likes4Comments
Business Rule Compile Error and Warnings
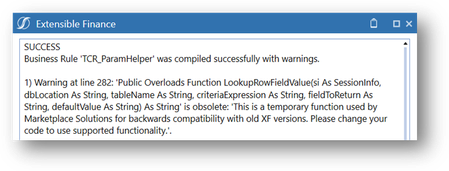
OneStream Platform releases will periodically include an update to the Business Rules compiler, which is noted in each version’s Release Notes. The enhancements typically make the compiler stricter in detecting syntax or other conditions, which are surfaced through Error or Warning messages. Error messages must be resolved, as the Business Rules will not complete the compile process. Warning messages are exposed to provide guidance to the Administrator. The displayed line items will still function but should be updated to support the latest compiler’s requirements. The method to resolve the Warning will vary. In some cases, a replacement function may be available, or there may be a change to a function’s properties. Example The above error message informs the Administrator of a Warning on the LookupRowFieldValue function having a property change. By reviewing the current rule, and by looking at the current Function Definition, the Administrator can determine that the property for “Criteria as a String” has been modified. The current Definition now defines the field as a dbWhere object. Old Properties LookupRowFieldValue(ByVal si As SessionInfo, ByVal dbLocation As String, ByVal tableName As String, ByVal criteriaExpression As String, ByVal fieldToReturn As String, ByVal defaultValue As String) As String To correct the condition, the Administrator is required to apply the required change. In this example, a dbWhere object must be used to define the criteria against the target database table. New Properties LookupRowFieldValue(ByVal si As SessionInfo, ByVal dbLocation As String, ByVal tableName As String, ByVal dbWheres As List(Of DbWhere), ByVal fieldToReturn As String, ByVal defaultValue As String) As String Other Compile Issues - Namespaces The Vb.Net language in OneStream offers the designer flexibility to implement custom solutions using predefined libraries as well other compatible third-party libraries. During a Business Rules compile, there are NameSpaces in OneStream that will be implicitly compiled: microsoft.visualbasic system.linq system.collections.generic system.collections system.text OneStream also has predefined Namespaces in Business Rules, which if utilized, must not be removed from the rule to compile properly. Imports System Imports System.Data Imports System.Data.Common Imports System.IO Imports System.Collections.Generic Imports System.Globalization Imports System.Linq Imports Microsoft.VisualBasic Imports System.Windows.Forms Imports OneStream.Shared.Common Imports OneStream.Shared.Wcf Imports OneStream.Shared.Engine Imports OneStream.Shared.Database Imports OneStream.Stage.Engine Imports OneStream.Stage.Database Imports OneStream.Finance.Engine Imports OneStream.Finance.Database The solution to resolving a Namespace issue will depend upon whether the rule exists in a Member Formula or as part of a Business Rule file. When an unsupported Namespace is used in a Business Rule file, the Namespace can be added to the Imports to allow the Business Rules to compile. Member Formulas do not allow access to modify the Import section of Business Rules. If the unsupported Namespace is part of a Member Formula, then the full Namespace must be added to the affected expression or variable.2.6KViews7likes0CommentsGenesis Buttons Distribution and Size
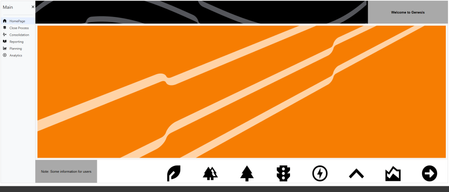
Hi, Can you please make it possible to: Distribute buttons other than in a grid 2xN style. Ideally it would be great to have them stacked vertically or horizontally Have the ability to either change the size of the buttons and/or for the buttons to size with the screen. Currently the buttons are one size and this means that they do not insert into rows with a row height below 150, they do not shrink with the screen so the title gets cut off if the user is running on a desktop but the developer worked on a bigger screen, and the second button can be lost off screen (if the buttons are stuck on the far left and the screen is too small, for example) or the third+ buttons are lost if inserting into a fixed size card (for example at the bottom of the screen). Examples: Row height is 100, button titles are cut off: Screen size too small and last button is lost: I was forced to create 1 card 1 button but for the last card I have 3 buttons, you can only see 2: Here is an example of a vertical stacked layout but all the button titles are lost due to screen size:41Views6likes0Comments